Posted on

A Sailor’s Journey – Bring The Wind Sailing

Before I was born, my family was already sailing Georgian Bay in Lake Huron, Ontario on a Tanzer 26. When I came along as the youngest of 4 boys my parents were diagnosed with “2 footitis” and they transitioned to a 30 foot 1982 Nordica. My dad was always bringing his old school camcorder with us to create home videos of our sailing trips. As a young adult I purchased my first sailboat and continued the family tradition. It wasn’t until years later that I stumbled upon those VHS tapes containing the videos and all of those memories came back to me. This inspired me to begin to capture my family’s sailing adventures on youtube, at first privately, but now publicly. 

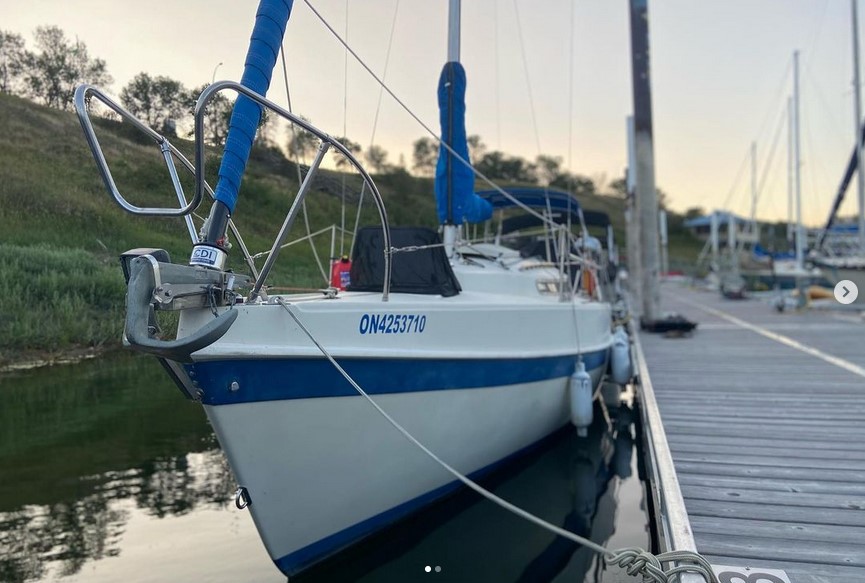
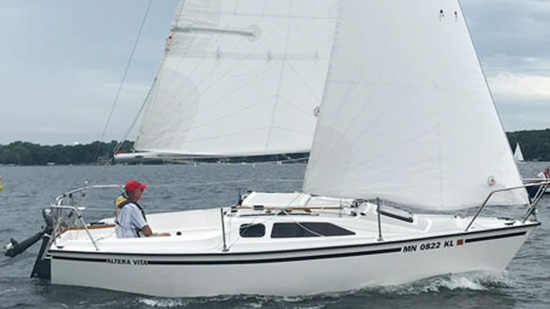
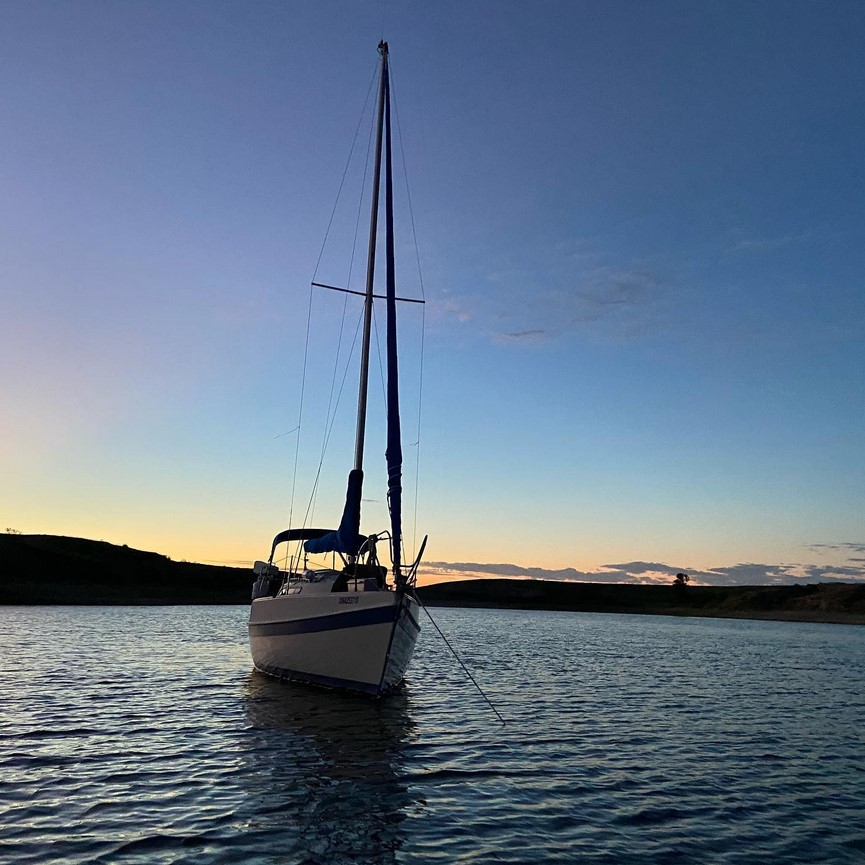
After some trial and error on finding my perfect sailboat, I finally stumbled across The Julia D, my Tanzer 7.5 on an acreage amongst the foothills of Sundre, Alberta. At the time, I had a motorbike with no use to me that was recently restored. I got in contact with the owner of the Tanzer and we worked together to come to an agreement of a straight across trade, motorbike for sailboat.

During this exchange, I learned some valuable information about my Tanzer. To start, the name of the boat was already The Julia D, which was named after the wife of the first owner and the sailboat had originated from Manitoulin Island, Ontario. Fun fact: Manitoulin Island was one of the many destinations we would sail to during my childhood. Both the previous owner and I decided to keep the name the same. Next, I learned that the current owner of the Tanzer was a carpenter, that he and his step father had completely redone the interior of the sailboat for a few years but the carpenter lacked any sailing skills or experience. Instead, it was his step father that was the sailor and when he unfortunately passed away, the son decided that he would part ways with their beloved Tanzer 7.5. The plan was to sail together. 

After receiving my new-to-me sailboat, I knew I wanted to convert the trailer to have a keel guide to assist with the haul out and launch. Where I am in Saskatchewan we don’t have cranes to lift the boats out of the water but do have a travel lift and tractor that is operated by members of the lift company (us). The use of a trailer is less stressful and saves time. After the conversion was complete, my Tanzer was still equipped with hank-on sails, which I was used to as my previous boats and my parents boat were the same.

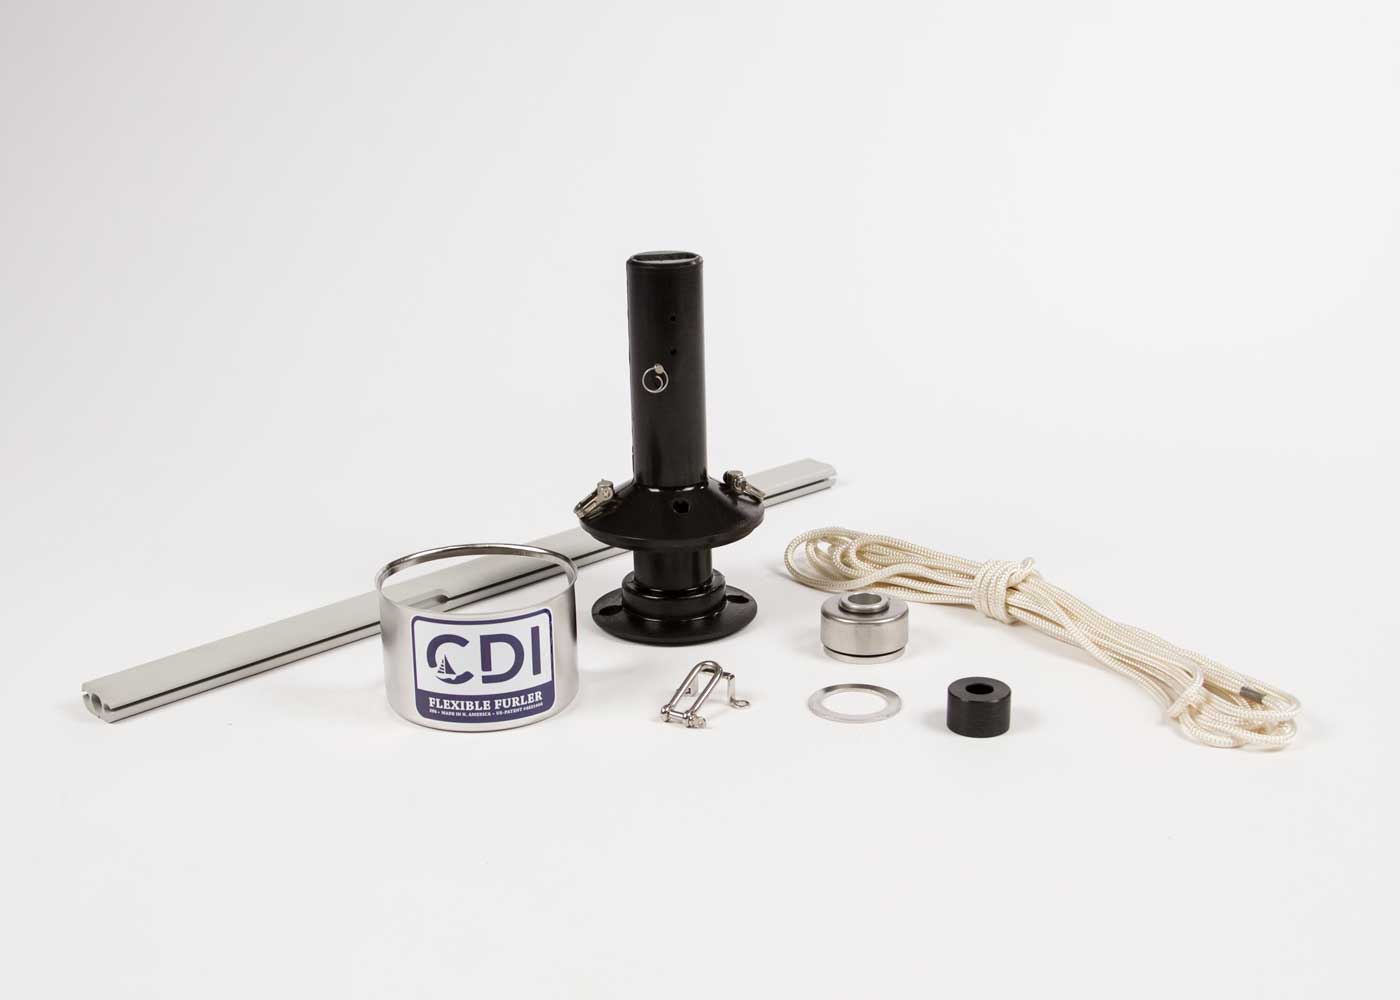
During some time watching YouTube, I realized that not only should I start shopping for a new Tanzer 7.5 headsail, but a lot of the sailing channels are running a furling system on their boats. I decided to contact Precision Sails to order a new 115% jib and during that time I asked for their opinion on furling systems, to which they recommended for me to look into CDI Flexible Furlers.


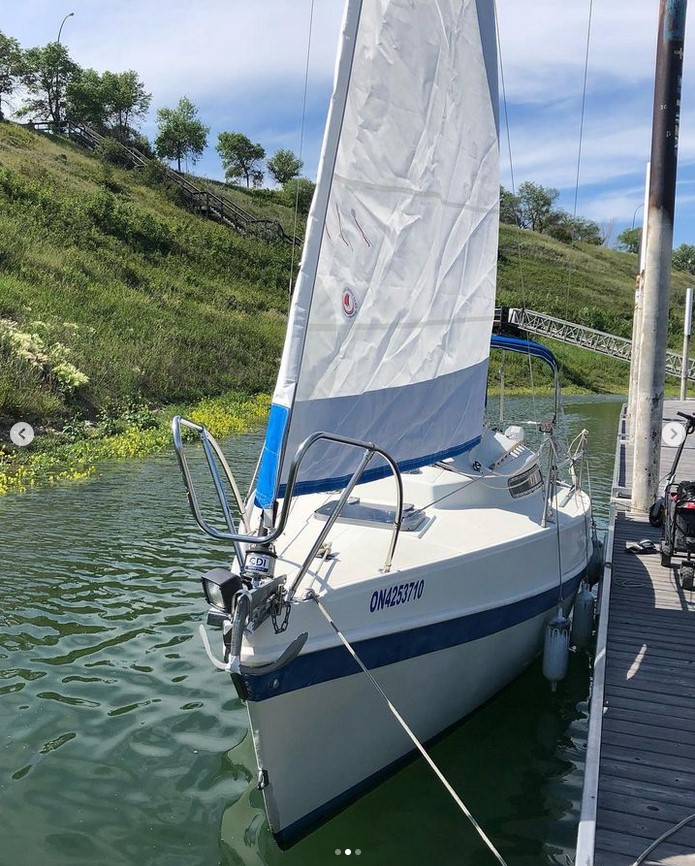
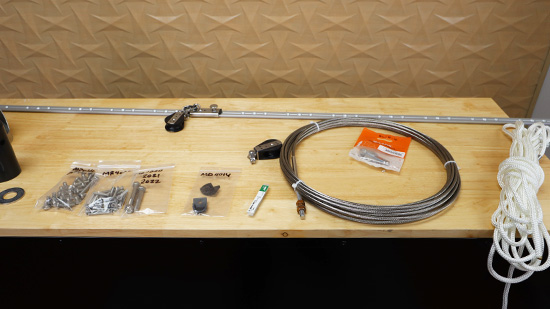
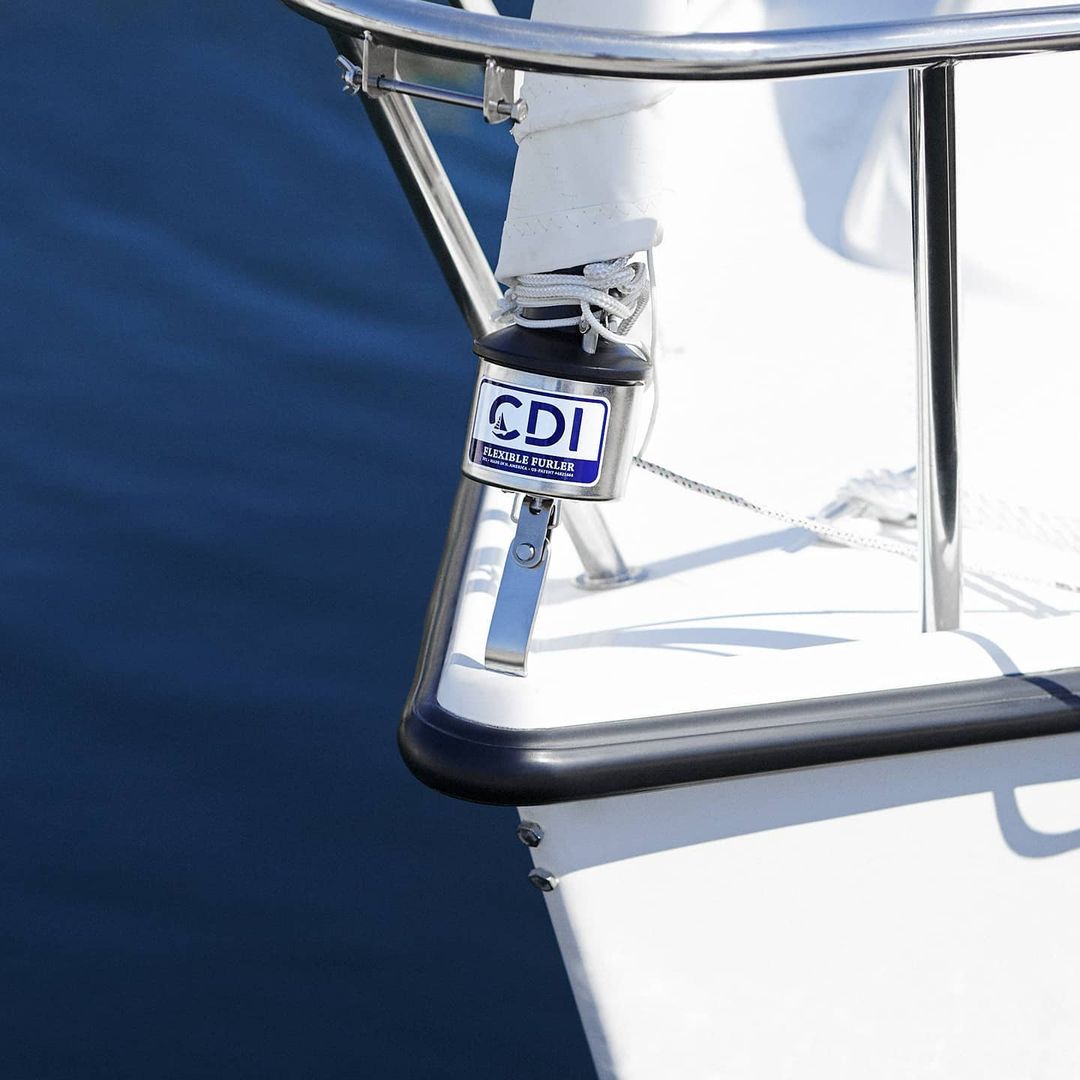
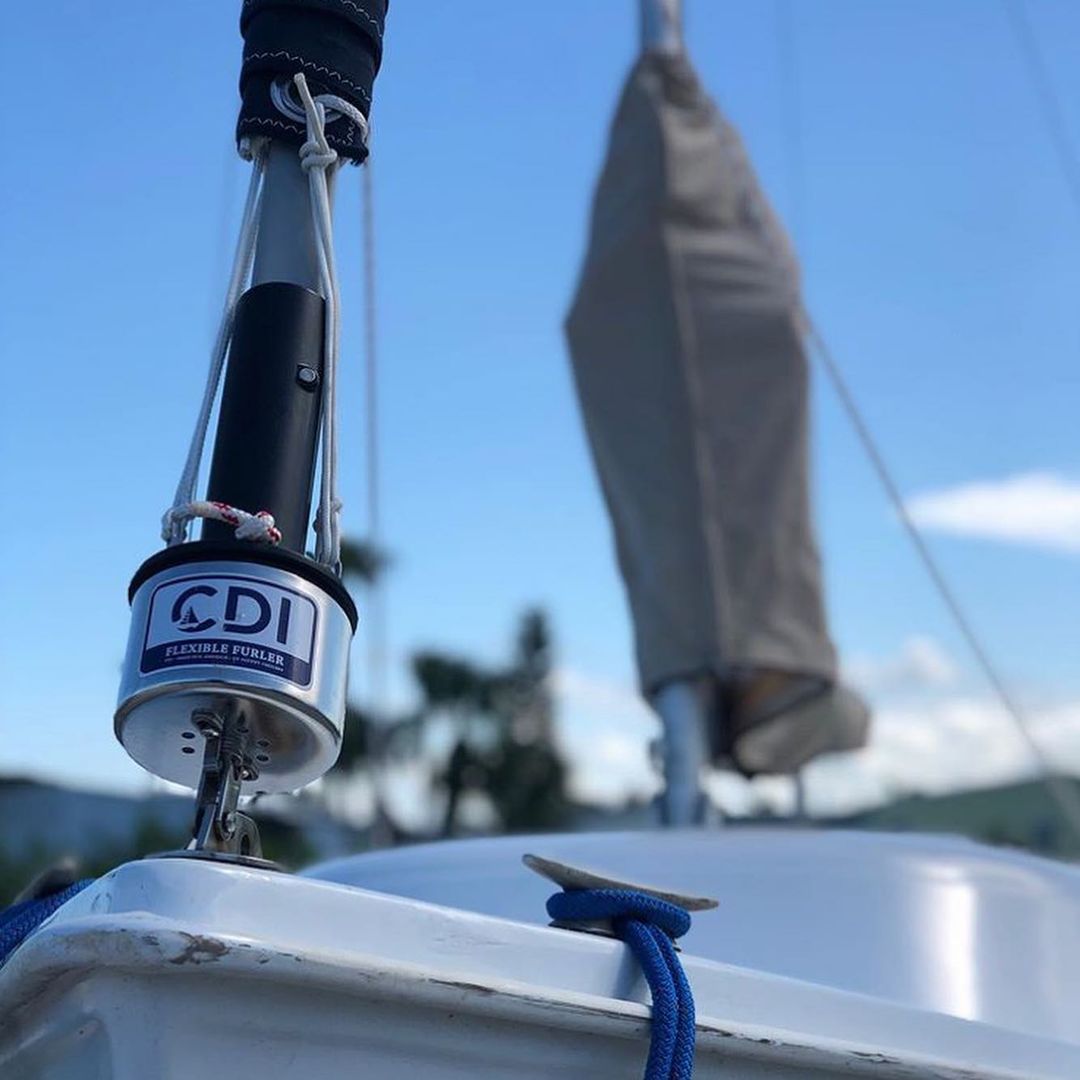
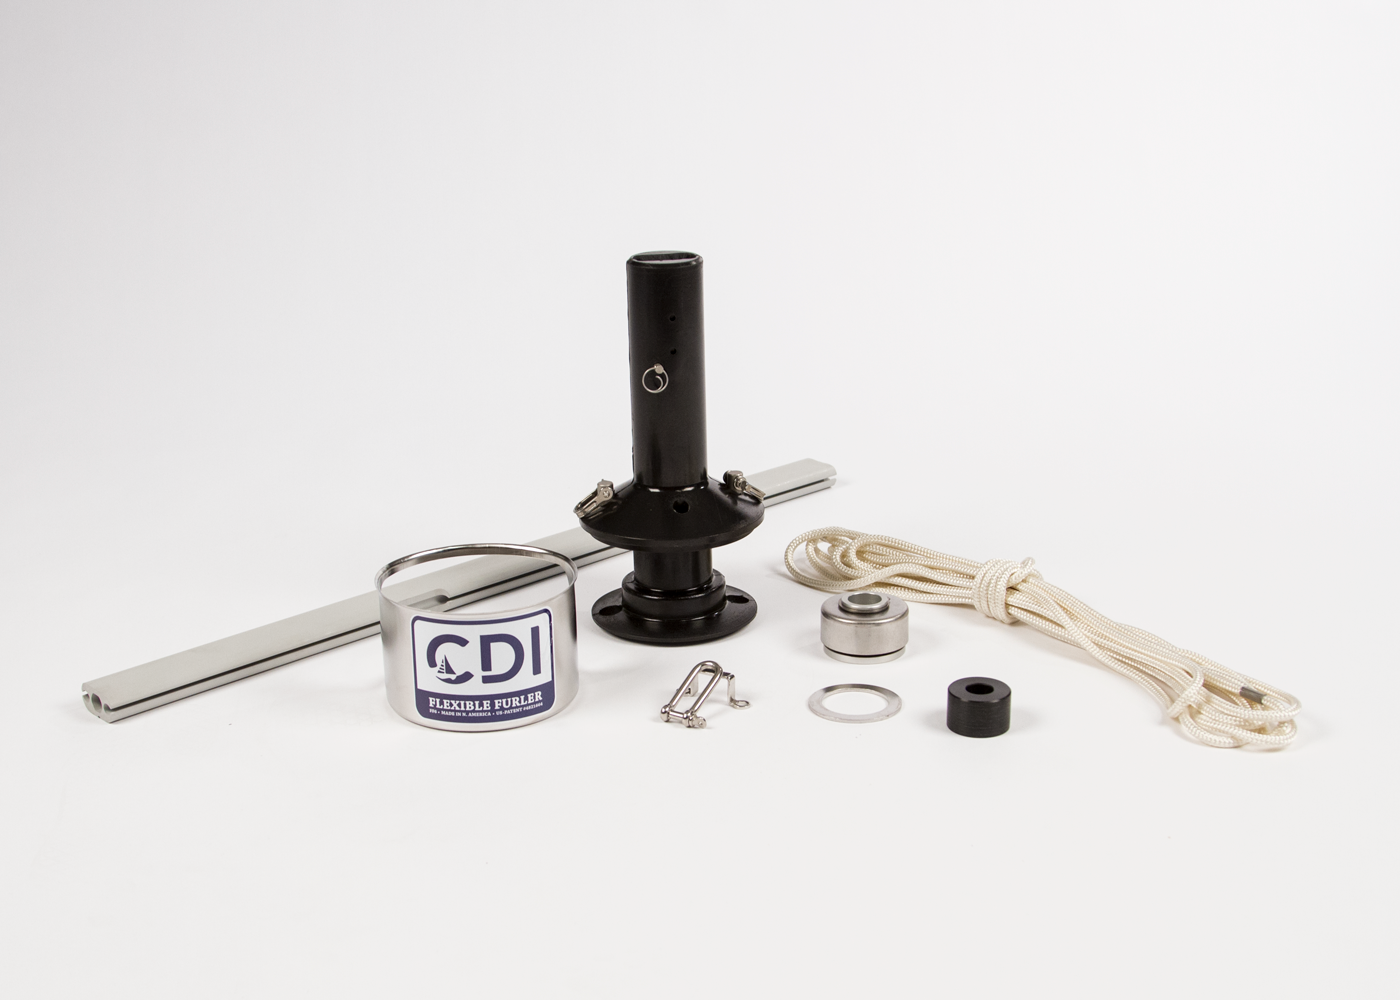
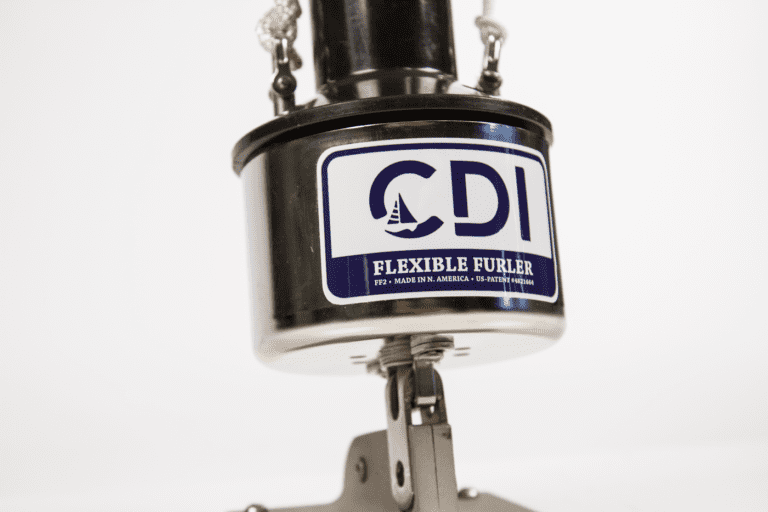
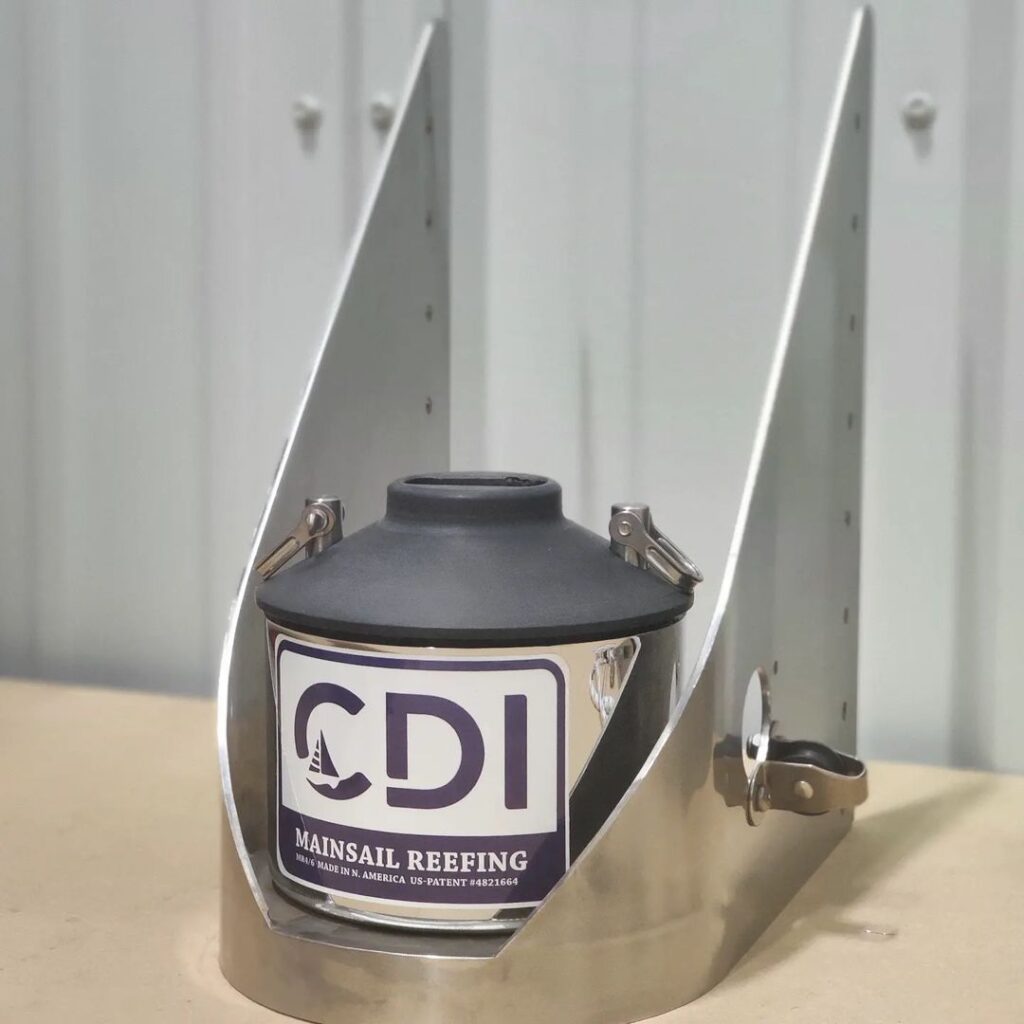
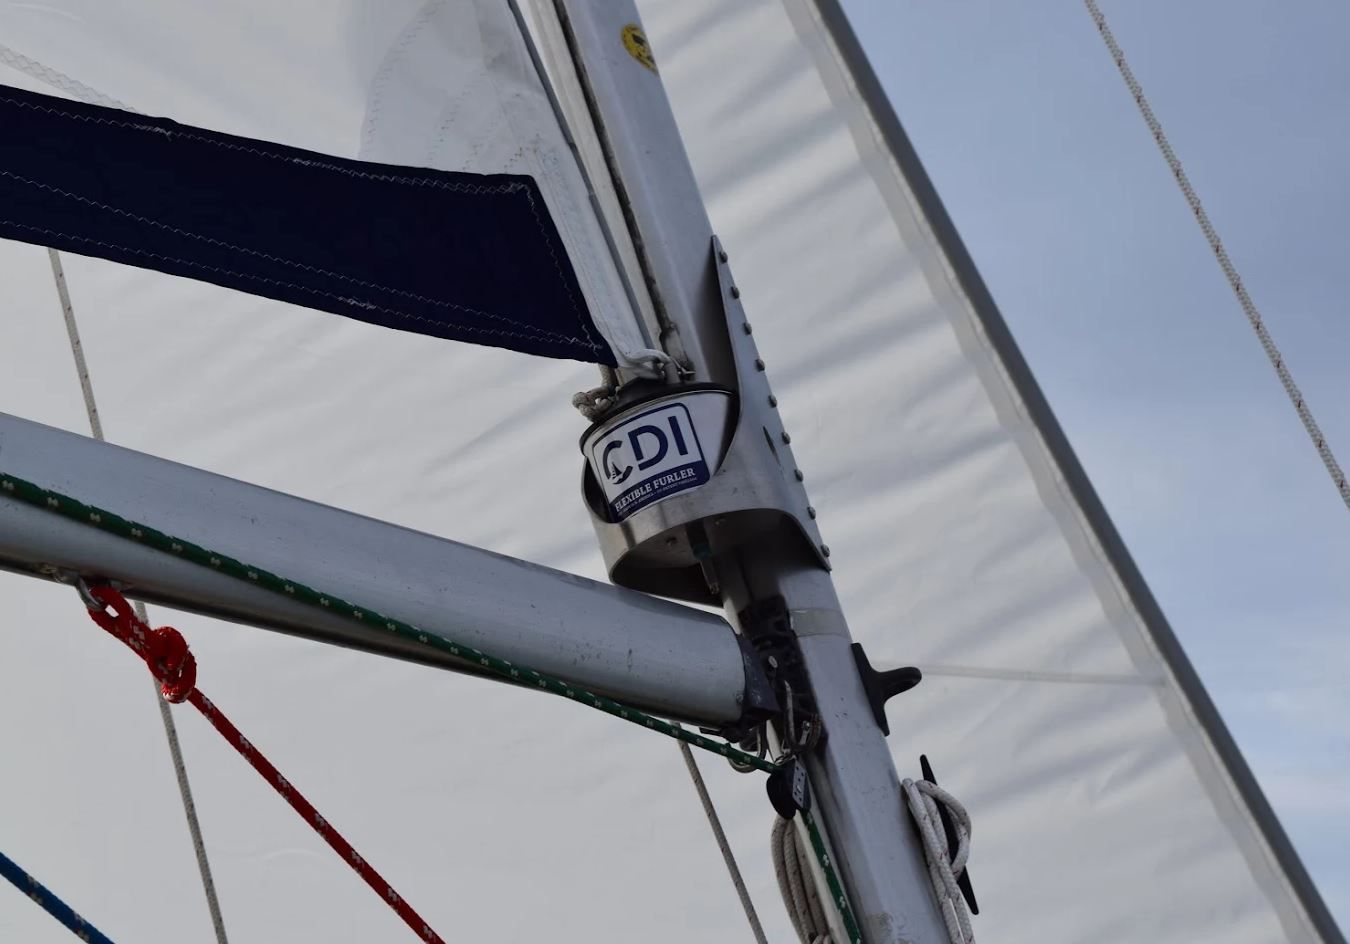
I found the CDI Flexible Furler FF2 to be a great option for me, after some research, due to its ability to be installed over the existing stay and being a DIY friendly option. Once it came in and it was time to install, I invited one of my brothers over to help out with installing the CDI Furler and Precision Sails headsail at the same time.

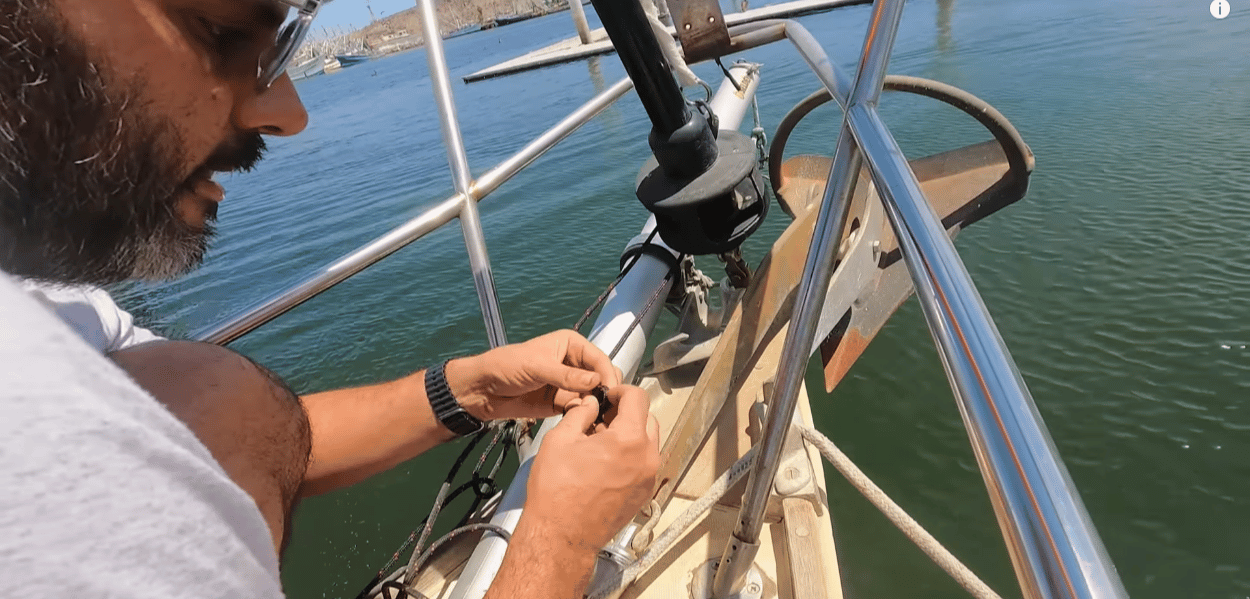
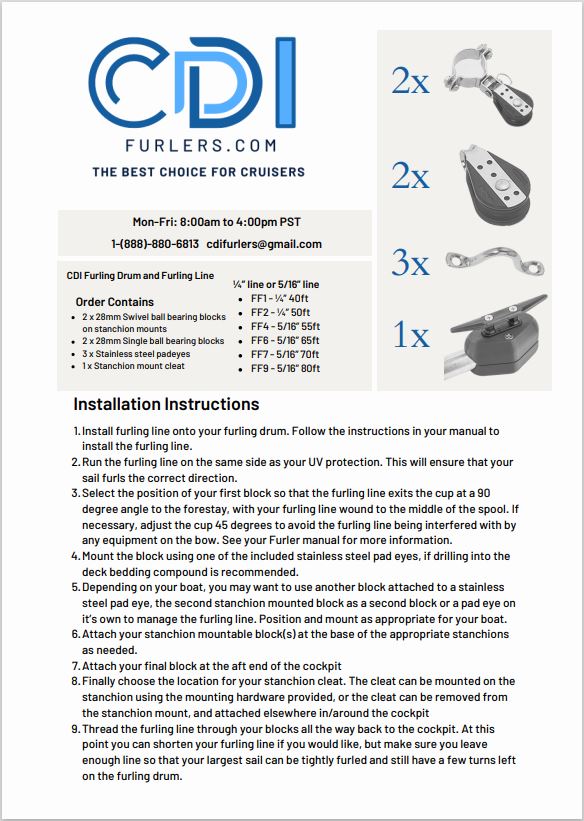
The installation wasn’t too difficult, but we found the most difficult part being the adjustments in order to get everything perfect. We also found that the instructions that came with the furler were a little difficult to follow, but after a recent phone call with some of the staff at CDI Furlers, I was informed that they are planning to come out with in-depth installation videos which will be a huge help!

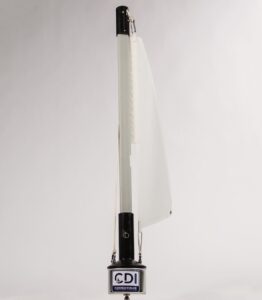
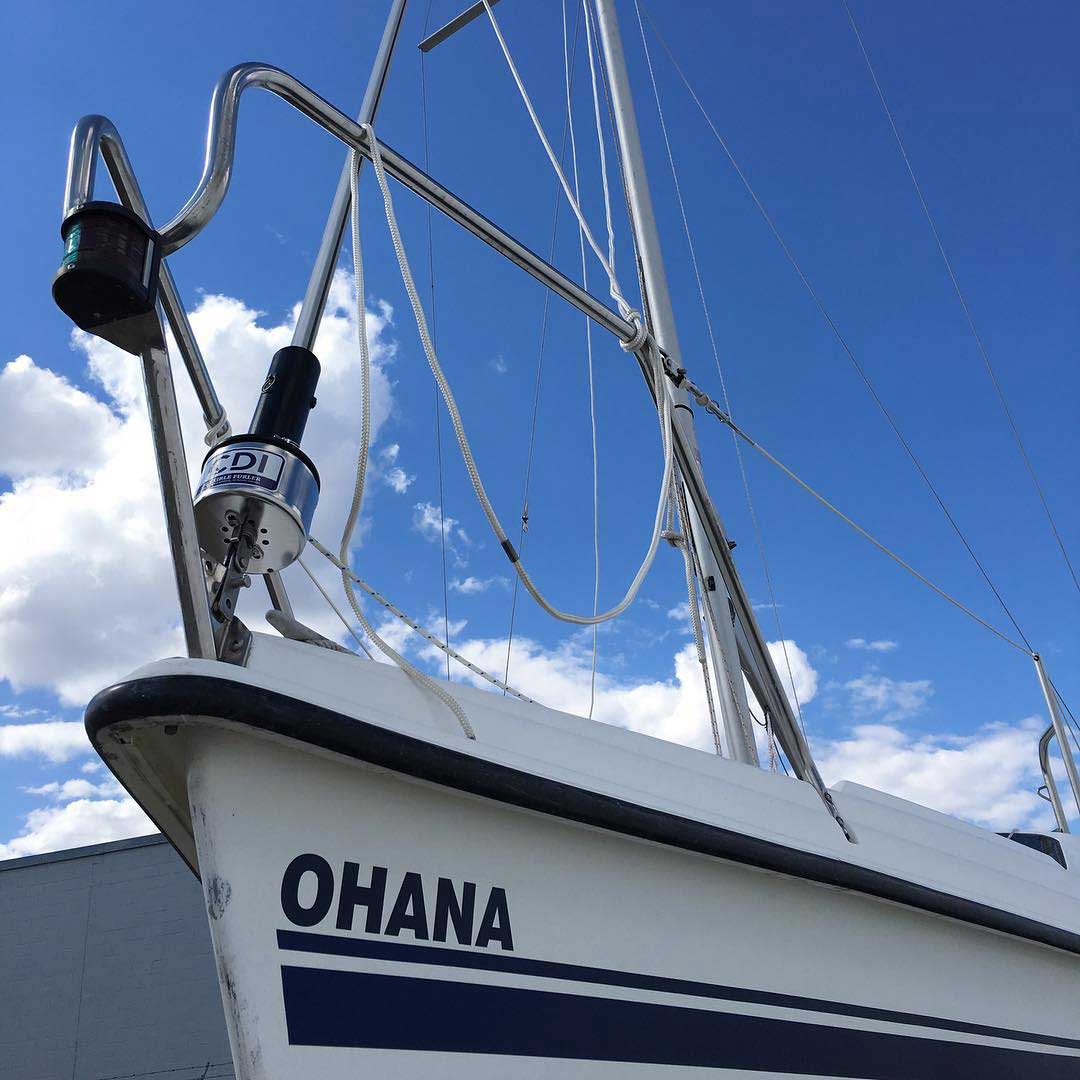
After all was complete, it was time to sail, and I couldn’t be happier with both products, the furler and the new sail. Not only is it easier for me to sail solo, but it’s also much easier for me to sail with my children as I can now adjust my foresail from the cockpit instead of having to go to the front of the bow to drop the fore sail and bag.

During my call with the CDI Furlers team, I was asked what a few tips would be to other sailors looking to install a CDI Flexible Furler.

  1. Take as many photos and videos as possible! Keep them in an album on your phone because if you are like me and need to put up and take down your sails every season, these will help you remember what you did right, and more importantly, what you don’t want to do.
  2. Make sure to remember which way your sail needs to furl. I made this mistake and installed my sail to furl the wrong way which ended up causing the sacrificial UV strip to be covered. It’s a bit of a pain to undo and redo everything a second time.
  3. When setting up your sails with the furler, think of your forestay as a clothesline. Attach a messenger line or mast line to close the loop with your sails attached at the bottom. From there, you can just hoist the sails up like a clothesline.

I still think about the carpenter and his late step father from time to time when I’m enjoying The Julia D. My plan is to have the carpenter out to Lake Diefenbaker to see what I have done to improve her while taking him for a sail one weekend bringing everything full circle for him and his late step father.

Posted on

Choosing the right Flexible Furler for your boat

CDI Flexible furler FF2 model

When trying to select the right CDI Flexible Furler for your boat, there are a few things to check on to make sure you order the correct one!
In this guide we will walk through all the steps to measure your boat and order with confidence!

The first thing we need to do is take some measurements from your boat.

Measuring the pin to pin length of your forestay

If your forestay is disconnected from the boat:
1) Lay the forestay out flat
2) Measure from the mast pin at the top of the forstay all the way down to the T-Bolt at the bottom of the turnbuckle*
3) Check your manual to make any deductions required for installation

*If you need to undo the turnbuckle to take the forestay off the rig we highly recommend marking the correct turnbuckle position with a sharpie for easy reinstallation.

If your forestay is connected to the boat:

1) Attach the end of your tape measure to your headsail halyard

2) Hoist the tape all the way up, until it stops on it’s own

3) Take the measurement from your tape. This will get us close to the correct forestay measurement
4) Now we must step back with the tape still hoisted, and look at the distance from the top of the tape, to the forestay pin. Take your best estimate, and add that measurement to the measurement we got from the hoisted tape measure. This is our forestay length.
5) Check your manual to make any deductions required for the installation of your furler.

Measuring the diameter of your forestay wire

To measure your forestay wire all you need to do is line calipers up with the thickest point of the wire on each side, and record the measurement from your caliper.

Measuring the diameter of the turnbuckle pin

To measure the diameter of your turnbuckle pin, simply use your calipers at the thickest part of the thread.


You can also watch our video down below where Darryl reviews the process of measuring your boat.

Once you have those measurements, compare them to the table below and it will show you which furler will best fit your boat.

Furler Sizing Table

Flexible Furler Model

FF1

FF2

FF4

FF6

FF7

FF9

Max Headstay Length

21′

29′

33′

39′

47′

53′

Max Headstay Wire

1/8″

3/16″

1/4″

1/4″

1/4″

5/16″

Max Turnbuckle Pin

1/4″

5/16″

7/16″

7/16″

1/2″

1/2″

Luff Tape

#6

#6

#6

#6

#6

#6


Posted on

Identifying Your CDI Flexible Furler

CDI Flexible Furler Parts Laid out on white background.

Are you unsure about which CDI Flexible Furler model is installed on your boat? Determining the model of your furler can be crucial for maintenance, replacement parts, or upgrading purposes. Luckily, with a few simple measurements, you can easily identify the specific model of your CDI Flexible Furler. Here’s how:

CDI Flexible Furler Parts Laid out on white background.

Step 1: Measure Cup Diameter

The first step in identifying your CDI Flexible Furler model is to measure the stainless steel cup at the base of the furler. This cup diameter varies between different models:

  • FF1: Cup Diameter – 3.5 inches
  • FF2: Cup Diameter – 4 inches
  • FF4: Cup Diameter – 5.8 inches
  • FF6: Cup Diameter – 5.8 inches
  • FF7: Cup Diameter – 6.5 inches
  • FF9: Cup Diameter – 6.5 inches

Use a measuring tape to accurately measure the diameter of the stainless steel cup, ensuring you measure across the widest part of the cup.

CDI Flexible Furler Cup

Step 2: Determine Max Headstay Length

Next, you’ll need to determine the maximum headstay length of your furler. The headstay length is the distance from the center of the headstay pin on the mast to the top of the furler drum. This measurement can be obtained by hoisting a tape measure up the luff of your sail and measuring from where it stops to the tack attachment at the bottom of your furler, then measuring from the tack attachment to the base of the headstay.

Here are the maximum headstay lengths for each CDI Flexible Furler model:

  • FF1: Max Headstay Length – 21 feet
  • FF2: Max Headstay Length – 29 feet
  • FF4: Max Headstay Length – 33 feet
  • FF6: Max Headstay Length – 39 feet
  • FF7: Max Headstay Length – 47 feet
  • FF9: Max Headstay Length – 53 feet

Ensure you measure accurately from the center of the headstay pin to the tack attachment to get the correct headstay length.

CDI Flexible Furler Fully Assembled

Step 3: Compare Measurements

Once you have obtained both measurements – cup diameter and max headstay length – compare them to the specifications provided for each CDI Flexible Furler model. By matching your measurements with the corresponding model attributes, you can confidently determine which CDI Flexible Furler model is installed on your boat.

CDI Flexible Furler FF4 Installed on Boat

Identifying your CDI Flexible Furler model is a straightforward process that involves measuring the cup diameter and max headstay length. By following the steps outlined above, you can accurately determine the model of your furler, enabling you to make informed decisions regarding maintenance, repairs, or upgrades.

Posted on

How to Set your Internal Halyard Length

CDI-MR2-Parts

One of the main advantages of the CDI Flexible Furler is the internal halyard, From giving you flexibility to add a genoa sleeve or other accessory to be run off your rigs existing halyard, to eliminating the possibility of halyard wrap on your headsail having an internal halyard is a huge advantage.

When your Flexible Furler arrives, the halyard will likely arrive too long.
Do not cut the halyard until the Flexible Furler installation is complete.

After you have your new Flexible Furler installed on your boat, and you are ready to hoist your sail, now is the time to determine the correct length for your halyard.

Using the safety line attached to the sail end of your halyard, pull the halyard end down. Make sure to attach a safety line to the opposite side so that the ferrule end of the halyard can be pulled back to the bottom once the sail is secured.
Some trial and error will be required to get the length just right.
Tie the head of your sail to the halyard, start by estimating how much length you may want to remove from the halyard and secure the head of the sail at that point. Do not cut yet. Hoist the sail, and note how far the head is from the top. Lower the sail, and retie the head to take up that gap.

Repeat this process until the sail sits at the correct position on your forestay. Finish by lowering the sail, cutting the excess off of the halyard line, and melting the end of the line to prevent fraying.


Make sure to contact us if you have any questions! We are always happy to help!
Posted on

Trailering your boat with a CDI Flexible Furler Installed

CDI-FurlerForYourBoat

Your new CDI Flexible Furler is a fantastic choice if you find yourself trailering your boat. There are a few things to keep in mind when you do put your boat on a trailer with a CDI Flexible Furler installed.

The first thing you should note is that your forestay, including your assembled CDI Flexible Furler, is longer than your mast. When trailering with your mast lowered, this means that your drum is likely hanging over the end of the mast.
This can cause your luff extrusion to bend, over time this bend will become permanent and you will have to purchase a new luff extrusion.

In order to prevent this you can either strap a board to the bottom end of the mast so it sticks out long enough for the drum to sit on top of, or you can detach the forestay at the top of the mast and line the bottom of the drum up with the bottom of the mast. Since the top of the CDI Flexible Furler is much lighter than the bottom it is easier to support.

The second thing you must take care of is your luff extrusion. Take care to strap the luff extrusion flat to your mast so that it does not bend or twist. We recommend using more straps than may be necessary to be extra sure it does not move and shift.

Once you do get the boat to where it is stored, it is recommended to remove the foil from the mast and lay it down completely flat and out of the elements.

Posted on

Accessories and your new CDI Furler

Here at CDIFurlers.com we want to make sure you are equipped with everything you need to have an amazing time sailing.

With your new CDI Furler we have some fantastic accessories that can really enhance your experience. In this article we will discuss some of our top recommendations!

Deck Hardware Kit
Our deck hardware kits include all the hardware you need to install and run your furling line. Our kits include premium quality hardware from Viadana, such as stanchion mountable blocks, single blocks, stainless steel padeyes and our custom stanchion mountable cleat.
2 different kits are available, with different sized furling line depending on your furler model.
Our kits are put together so that they work with a wide variety of boat models, and are completely flexible so that you can set your boat up just how you want it.

Genoa Sleeve
The genoa sleeve is one of our top recommendations. With your new CDI furler, you will be running your headsail off of the internal halyard that comes with the system. This leaves the headsail halyard on your boat completely free. The genoa sleeve can be set up to run on this halyard, which means that you do not need to install sacrificial UV protection on your headsail! The biggest advantage of this is the huge weight savings on your sail, which gives you greatly increased sail performance.


Spinnaker Sock

A spinnaker sock is the perfect tool for managing your spinnaker. With the large size of most spinnakers, it can be a real chore to manage while sailing. The spinnaker sock takes care of this.
With a reinforced plastic ring at the bottom, the spinnaker sock can be lowered over an unruly spinnaker without snagging or getting caught. This will snuff your spinnaker and allow you to pull it in.


Spinnaker Tacker

The spinnaker tacker works to keep your spinnaker close to the centerline of your boat. It does this by sliding overtop of your furled headsail allowing you to adjust the tacker along your downhaul and tack line as you need.
The tacker will also allow you to fly your symmetrical spinnaker similar to an asymmetrical spinnaker, running without a spinnaker pole.


Lazy Cradle

The lazy cradle is a fantastic sail management and storage tool. This allows you to easily lower the halyard and allow the sail to flake between your lazy jacks. There is a high quality YKK zipper running up the length of the bag so it can be closed for long term storage, keeping your mainsail safe from the elements.

Posted on

Which Bearing option should I choose?

CDI Flexible Furler FF4 Installed on Boat

Which Bearing option should i choose?

For the CDI FF1, FF2, FF4, and FF6 you have the option of upgrading to Torlon Ball Bearings. There are many reasons you could want to go with the ball bearings, let’s explore those!

Smoother, easier furling

One of the main advantages of upgrading is that it provides a smoother and easier furling experience. The ball bearings roll smoothly and reduce friction, which means you’ll require less effort to furl your sail, making the process much more comfortable and efficient.

Less stress on your furler and rig

The upgrade to ball bearings means there’s less stress on your furler and rig. The bearings reduce the load and tension on the furling drum, making it easier for the furling line to move smoothly. As a result, the system experiences less wear and tear over time, which means it will last longer and require fewer repairs.

Much easier operation under load

The upgraded ball bearings make for much easier operation under load. When you’re under sail and require furling or reefing, the furling line experiences high tension, which can make it difficult to furl or unfurl your sail. With the ball bearings, the furling drum turns smoothly, and the furling line moves with less resistance, making it easier to furl or reef even under heavy loads.

We highly recommend that any client who finds themselves sailing in high wind situations upgrades to the ball bearings. If you find yourself in an emergency situation needing to reef or even fully pull in your sail, the ball bearings will help make that smooth and safe!

The CDI Ball Bearing is incredibly easy to clean and maintain. There is absolutely no lubricants required! We simply recommend rinsing the bearing with fresh water at the end of your sailing season.


Posted on

Measuring for a CDI Flexible Furler

CDI Flexible furler FF2 model

Measuring before purchasing your new CDI Flexible Furler.

To ensure you purchase the correct model to fit your boat/rig. There are three things we need to measure. First is the pin to pin length of your forestay. We have a helpful instructional video on how to get this measurement below!

The steps are quite simple.


The pin to pin length of your forestay

If your forestay is disconnected from the boat:
1) Lay the forestay out flat
2) Measure from the mast pin at the top of the forstay all the way down to the T-Bolt at the bottom of the turnbuckle*
3) Check your manual to make any deductions required for installation

*If you need to undo the turnbuckle to take the forestay off the rig we highly recommend marking the correct turnbuckle position with a sharpie for easy reinstallation.

If your forestay is connected to the boat:

1) Attach the end of your tape measure to your headsail halyard

2) Hoist the tape all the way up, until it stops on it’s own

3) Take the measurement from your tape. This will get us close to the correct forestay measurement
4) Now we must step back with the tape still hoisted, and look at the distance from the top of the tape, to the forestay pin. Take your best estimate, and add that measurement to the measurement we got from the hoisted tape measure. This is our forestay length.
5) Check your manual to make any deductions required for the installation of your furler.


The diameter of your forestay wire

To measure your forestay wire all you need to do is line calipers up with the thickest point of the wire on each side, and record the measurement from your caliper.


The diameter of the turnbuckle pin

To measure the diameter of your turnbuckle pin, simply use your calipers at the thickest part of the thread.


Posted on

Using a Genoa Sleeve with your CDI Furler

CDI-FlexibleFurler-FF2-installed-on-boat

When would I use a Genoa Sleeve with my CDI Furler?

Whether you have converted your hank on headsail to a furling headsail and want to save the weight addition of the UV, or you need a storage solution for your new race sails, we have a solution for you!
A huge advantage of your new CDI Flexible Furler is the internal halyard. Not only does this eliminate the possibility of halyard wrap, it also frees up your rig’s existing halyard for a genoa sleeve!

Benefits of Using a Genoa Sleeve with a CDI Flexible Furler

There are a few main benefits to using a genoa sleeve with your CDI Furler.

1) Increased Sail Performance

One huge advantage of using a genoa sleeve with your CDI Furler, is
that you can forgo the sacrificial UV protection on the sail. The great
thing about this is you save a ton of weight on the sail! This will
allow your sail designer to maximize the performance of the sail.

2) Sail Protection and Longevity
Keeping your sail completely protected from UV rays while not in use is going to greatly increase the lifespan of your sail!

The genoa sleeve will also keep the sail safe and protected while furled
and not sailing. Our genoa sleeves come equipped with a lashing system
that will protect it from being damaged or blown open in high wind
conditions.

In Summary

Using a Genoa sleeve with a CDI furler can make your sailing experience more comfortable, efficient, and enjoyable. The sleeve helps to protect the sail from the elements, reduce wear and tear, and maintain the sail’s performance long term by protecting the sail from damaging UV rays. Installing a Genoa sleeve is a simple process that can be done by anyone, and it is a perfect fit for your CDI furler! If you’re looking for a way to enhance your sailing experience, consider using a Genoa sleeve with a CDI furler.


Posted on

Mainsail Furler Installation Help

Installing Your Mainsail Furler

1) Place the extrusion on the ground

2) Stand on the inside of the taped up circular luff so the luff doesn’t spring open and hit you when the tape is cut

3) There will be bands of tape all down the luff. Starting with the tape closest to the end of the luff extrusion, cut the tape and carefully uncoil to the next band of tape

4) While holding the untapped portion of the luff, carefully slice the next band of tape

5) Continue this process until there is only one tape band remaining. Stop before cutting the final band.

6) You will need 1-2 helpers for the final step. Your helpers should hold the luff, both the coiled portion, and the uncoiled. When ready, cut the last tape band, and carefully allow the luff to assume its natural curve.

Important Notes
-Weighing the luff down flat on the ground and/or trying to straighten with a hair dryer will not work and will void your warranty! You must follow the instructions below.
-You will require some help. You need one person set up every 8 feet along the luff. Avoid twisting the luff, and do not let it sag.
-Please make note that there is a straight end (this was shipped straight) and a curved end.

1) Full instructions with photos are included on your shipping box. Please make sure to fully read these instructions before beginning.
We need to recoil the luff, in the opposite direction that it wants to curve naturally.
2) Tape your curved end to the other end at the point where the luff curve begins.
3) Lay the now taped luff back on the ground. Let it sit for at least 3 hours, at which point you can test to see if it is straight by carefully removing the tape.
4) If the luff still has a noticeable curve you must retape the luff and allow it to continue to sit. The warmer the weather, the faster this will be.

5) Some small curvature is to be expected, and will not affect performance. Your forestay tension will correct a gentle bend.

Important Note: If your luff has been stored incorrectly, coiled, or bent the best way to correct this is to sit the entire luff inside of a tube or pipe and leave the entire thing outside in direct sunlight for 1-2 weeks in the summertime.
Weighing the luff down flat on the ground and/or trying to straighten with a hair dryer will not work and will void your warranty!

Installation

1) Review the parts list and make sure you have everything you need.
2) Thoroughly read the instructions, if you have any questions please reach out to us. You can contact us via phone or email.
Phone: 607-749-4599
Email: [email protected]
3) First we need to install the upper brackets, there are 2 top straps and a top bracket assembly.
3a) The mounting arms on the top bracket assembly must be formed to the mast to match the mast shape.
3b) You may need to form the top straps wider or more narrow to fit your existing masthead. Be careful to bend each Top Strap equally.
3c) The top straps are to be installed by removing either the backstay pin or the main halyard sheave pin. Install the top straps outside of your existing masthead using one of the 5/16” dia. Bolts provided (2” or 2 ½” long as necessary). Secure this with a 5/16’ dia. Nylock nut.
3d) Using the ⅜” dia. X 1 ⅞” long clevis pin, connect the top straps and top bracket assembly
3e) Swivel the top bracket assembly until the stop is against the mast. Center the bracket assembly on the mast slot. Drill and tap through the top bracket assembly into the mast. Fasten with ¼-20 x ⅜” long screws.
4) Next we are installing the lower bracket assembly. Including the lower bracket and the reefing spool assembly
4a) Match your lower bracket mounting surfaces to the approximate mast width. If the mounting services on the bracket need to be closer together place the bolting flanges in a vise and carefully squeeze them together until the width is correct.
4b) Centered on the mast slot, 2 ¼” above the top of the boom you will see the bottom surface of the Lower Bracket. Then find the bracket cup surface, perpendicular to the mast. If the bracket is not perpendicular to the mast the bearings will not freely rotate and it will always be difficult to turn the system. Against the mast you will find the bracket stop flange. Drill and tap through the bracket mounting holes and fasten with ¼-20 x ⅜” long screws. You will see two longer fixture screws included, these may be used to pull the bracket close enough to the mast that the correct ⅜” long screws will mount into the mast. To ensure that the holes line up, we recommend you install each screw as it’s hole is drilled and tapped.
4c) Now we need to figure out if the mainsail reefing line should be mounted on the port or starboard side of the boat. Mount the reefing line sheave on the lower bracket roughly where you want the reefing line routed. If the reefing line exits on the port side of the lower bracket, your UV shield should be sewn onto the starboard side of the foot and leech of the sail. If the line exits on the starboard side of the lower bracket then the shield will have to be on port.
5) Assembly of the mainsail reefing system internal stay.
5a) Measure the distance from the centerline of the lower pin in hte double jaw toggle part of the top bracket assembly and the bottom surface of the lower mounting bracket. Add 1 ½” to your measurement. This is the length of your internal stay, from the center of the top eye to the end of the threaded stud. Now cut the unfinished end of the stay and assemble the stay-lok eye in accordance with the stay-lok instruction sheet.
6) Installation of the reefing system
6a) Cut the luff to the length you calculated in step 5a, minus 8”
6b) Install a reefing line (3/16”) through the sheave on the side of the lower mounting bracket, through the hole in the side of the bracket, and finally up through a hole in the spool. Tie this off with a stopper knot in the end of the furling line
6c) With the reefing line attached, install the spool onto the bearing mounted inside the stainless steel cup which is located on the lower mounting bracket. Before raising the mainsail, wrap roughly 20 turns of the reefing line around the spool.
6d) To assemble the halyard top fitting onto the luff extrusion, first feed the de-cored end of the halyard down the luff groove opposite the sail feed slot. Now insert the stainless steel ferrule down inside the groove.
Then push the halyard top fitting over the top of the luff and secure it with the locking screw. Make sure the other end of the halyard, the end that does not have the ferrule, exits the top fitting on the same side as the sail feed slot and slides freely.
6e) Now we need to tie a messenger line that is roughly the length of the luff extrusion to the de-cored end of your halyard. We need this to raise the sail. The other end of the halyard must be pulled until the ferrule is hard against the halyard top fitting. Cut the halyard so that the sail’s head is barely below the sail feed slot in the extrusion. Melt off the end of your line to prevent fraying.
6f) Insert the bottom end of the mainsail stay through the halyard top fitting, luff, spool, and then through the lower bracket to finish. Place the bottom end of the luff extrusion into the spool.
6g) At the top of the stay there is an eye, insert the top bracket internal stay pin there.
6h) Under the lower mounting bracket we need to assemble three 5/16-24 nuts on the lower threaded end of the internal stay. The two nuts are to be used as jam nuts to hold the stay in place while tightening the tension on the stay with the third nut.Carefully, to ensure you do not bend the mast, tighten the stay until snug. Now we loosen the jam nuts and jam them against the nut already tightened to the stay.
7) At this stage we can take accurate measurements for a new mainsail. The exposed luff track is your new sail’s maximum luff. To measure the foot, we need the length from the luff sail track along the sail foot slot to the end of the boom, then subtract 6”.
Once you have measured for your new sail, you can remove the mainsail reefing system and use your old sail until your new sail arrives. Once the new sail arrives, we can continue the installation.
8) Installing the reefing track to the top of the boom
8a) At the outboard end of the boom locate the reefing track.
8b) Drill and tap through the mounting holes 10-32 threads into your boom, down through the former mainsail foot rope groove. Now we mount the track with 10-32 x 1 ½” long screws as each hole is drilled and tapped.
8c) Install the reefing car on the track
8d) Install the track end stops
8e) Install the boom reefing block with 1935 shackle, to the outboard end of the boom.
9) Install the correct lead blocks to lead the 3/16” diameter reefing line to the cockpit
10) Attach our 5/16” diameter outhaul line to the loop on the reefing car. Route the outhaul line from the reefing car up through your sail’s clew block, back through the block on the reefing car, then through the block on the outboard end of the boom, and finally forward along your boom to the mast.
Install whichever lead blocks are best to lead your 5/16” diameter outhaul line along the boom to the mast and then finally to the cockpit.
11) When running lines to the cockpit, route them to the most convenient place for you. Use some fairleads and take as few turns as possible. Increased friction from more turns than necessary will make the system more difficult to operate. Generally at least one winch should be used to assist in pulling the sail in and out. Many customers remove the main halyard winch and used for this. If you choose to run with one winch, a pair of jam or clam cleats should be positioned in front of the winch.

12) In most cases the main reefing system will not operate as easily as the jib reefing system because of the increased friction. When operating your winch, be cautious that nothing is binding and no lines are caught up on obstructions.

1) Attach your halyard to the head of your sail
2) To pull your sail up, begin by pulling down on the messenger line. It is to be attached to the decored end of your halyard while feeding the luff tape into your sail feed slot.
3) Once the sail is hoisted, you need to remove the messenger line and fasten the decored end of your halyard to the halyard anchor shackle.
4) Tension the luff of your mainsail with your tack tension line, passing 2-3 parts through your downhaul shackle on the reefing drum and the grommet on the mainsail finishing with half hitches.
5) Adjust the amount of furling line on the furling drum as needed. Once the sail is tightly furled, you should have 5 to 10 turns remaining on the furling drum.

1) Begin by casting off your halyard tension line. Then tie a messenger line that is approximately the length of your mast, to the decored end of the halyard.
2) Lower your mainsail.

CDI MR2 Mainsail furler

Your new CDI Mainsail Reefing System is designed to be a set and forget furling and reefing system. It does not require routine maintenance, but we do recommend that you give it a thorough rinse with fresh water about once per system.
Wet lubricants of any kind are not recommended. These can cause dirt particles to get stuck in the bearing assembly causing premature wear and tear.
Dry lubricants such as a teflon spray is fine to make your furling easier.

If you are storing your mainsail reefing system for a long period of time, it is recommended that you leave your reefing system attached to the mast. Support your luff extrusion along the entire length to prevent it from sagging. Your luff must be stored straight, and flat in order for your warranty to remain valid.

Be careful not to expose the reefing system to temperatures exceeding 140°F. These temperatures frequently occur in warm climates under a boat cover.
The higher the temperature, the faster any luff bend will become permanent.

When cleaning the luff, we recommend a rag soaked with paint thinner. For any deep scrapes or dirt that has been ground into the luff, soak a rag in acetone. The reason for this, is acetone will dissolve the luff so that even deep scratches can be smoothed out.

Your new CDI Mainsail Furler is designed to be durable and trailerable.
When you trailer your boat, you can leave your mainsail reefing system installed on your mast. Make very sure that you have not positioned the mast on your boat or trailer in a position where the luff extrusion carries the weight of the mast. You must make sure that the luff extrusion is supported along its entire length to keep it from sagging. We recommend tying rope loops around the mast and luff extrusion every 2-3 ft.

Posted on

Do I need a new Mainsail when upgrading to a Mainsail Reefing System?

Do i need a new mainsail when upgrading to a mainsail reefing system?

Introduction:

Sailing enthusiasts always strive to improve their sailing experience, and one way to achieve this is by upgrading their sail management system. If you’re considering moving to a Mainsail Reefing System, you may be wondering, “Why do you need a new mainsail when moving to the Mainsail Reefing System?” In this article, we’ll explore the reasons why upgrading to this system requires a new mainsail, and how it can enhance your sailing experience.

What is a Mainsail Reefing System?

Before delving into the reasons for needing a new mainsail when moving to a Mainsail Reefing System, let’s first understand what it is. A Mainsail Reefing System is a type of sail control mechanism that allows the mainsail to be reefed or furled. This innovative system enables sailors to adjust the sail area quickly and efficiently, all without leaving the cockpit. Making it easier and safer to manage your sail.

Why do you need a new mainsail when moving to the Mainsail Reefing System?

Here are some reasons why:

  1. Size and shape: Mainsails designed for traditional mast and boom setups have a different size and shape than those designed for Mainsail Reefing Systems. A mainsail designed for a mainsail reefing system must have less roach, and must be flatter than a conventional main.
  2. Material: Mainsail Reefing Systems use a specific type of material that can withstand the stress and strain of reefing and furling. These materials are more durable than traditional mainsail materials, making them an essential part of the system.
  3. Design: The design of the mainsail is crucial to the system’s efficiency and performance. Mainsails for reefing systems are designed to be easily reefed and unfurled, ensuring that the sail’s shape and performance remain optimal.

Benefits of the Mainsail Reefing System

Now that we’ve covered why you need a new mainsail when moving to the Mainsail Reefing System, let’s explore the benefits of this innovative system:

  1. Easy handling: The Mainsail Reefing System allows sailors to adjust the sail area quickly and efficiently, making it easy to handle the sail and adjust to changing wind conditions without having to leave the cockpit.
  2. Enhanced safety: Reefing and furling the sail can be dangerous, especially in high winds. The Mainsail Reefing System makes this task more manageable and safer, reducing the risk of accidents.

Considerations When Upgrading to a Mainsail Reefing System

If you’re considering upgrading to a Mainsail Reefing System, here are some important considerations to keep in mind:

  1. Cost: Upgrading to a Mainsail Reefing System can be expensive, as it requires purchasing a new mainsail and the system itself. However, the benefits of the system can outweigh the initial investment.
  2. Maintenance: Unlike some mainsail reefing systems and furlers, the CDI MR2 and MR4/6 requires very little maintenance! We recommend rinsing the spool and bearing out with fresh water once or twice a season.
  3. Installation: Installing a Mainsail Reefing System can be done as a DIY project! We recommend having 1-2 people to help.

FAQs

Q1. Can I use my current mainsail with a Mainsail Reefing System?
A1. No you will need a specifically designed mainsail to work with your Mainsail Reefing System
Q3. Do I need a Mainsail Reefing System if I sail in calm waters?
A3. A Mainsail Reefing System can improve your sailing experience in any sailing conditions, as it allows you to adjust the sail's shape and size quickly and effeciently.
Previous slide
Next slide

Conclusion:

Upgrading to a Mainsail Reefing System can enhance your sailing experience by improving the safety, and ease of handling of your mainsail. However, it’s essential to understand that this system requires a new mainsail designed specifically for the system’s unique features. When considering this upgrade, it’s crucial to keep in mind the benefits, and considerations to make an informed decision.

Please see our video below to see Darryl discussing our Mainsail Reefing Systems with Jeremy Roszmann, an expert sail designer who has designed thousands of sails throughout his career.